Admire stunning elegant showers au that enhance luxurious bathroom design with modern fixtures.

Elevate Your Bathroom with Elegant Showers au: Style and Functionality Combined

Understanding Elegant Showers au

In the quest to create a serene and stunning bathroom oasis, elegant showers au emerge as a focal point that blends functionality with aesthetics. The concept of an elegant shower goes beyond merely the installation of plumbing fixtures; it encapsulates a cohesive design, innovative features, and an immersive experience that transforms a simple routine into a moment of tranquility.

What Makes an Elegant Shower?

An elegant shower is characterized by its attention to design, materials, and user experience. Elements that contribute to this elegance include:

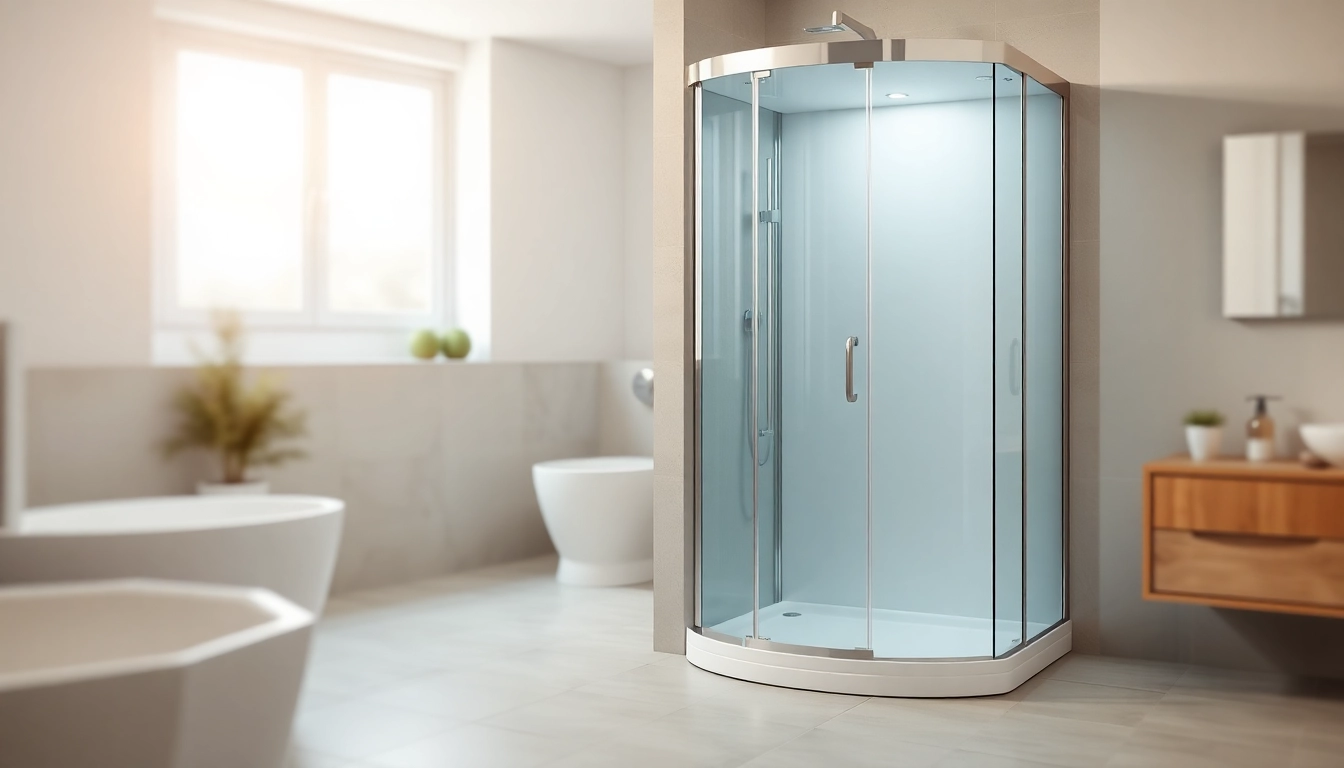
  • High-Quality Materials: Premium materials such as ceramic tiles, tempered glass, and stainless steel not only enhance the visual appeal but also ensure longevity.
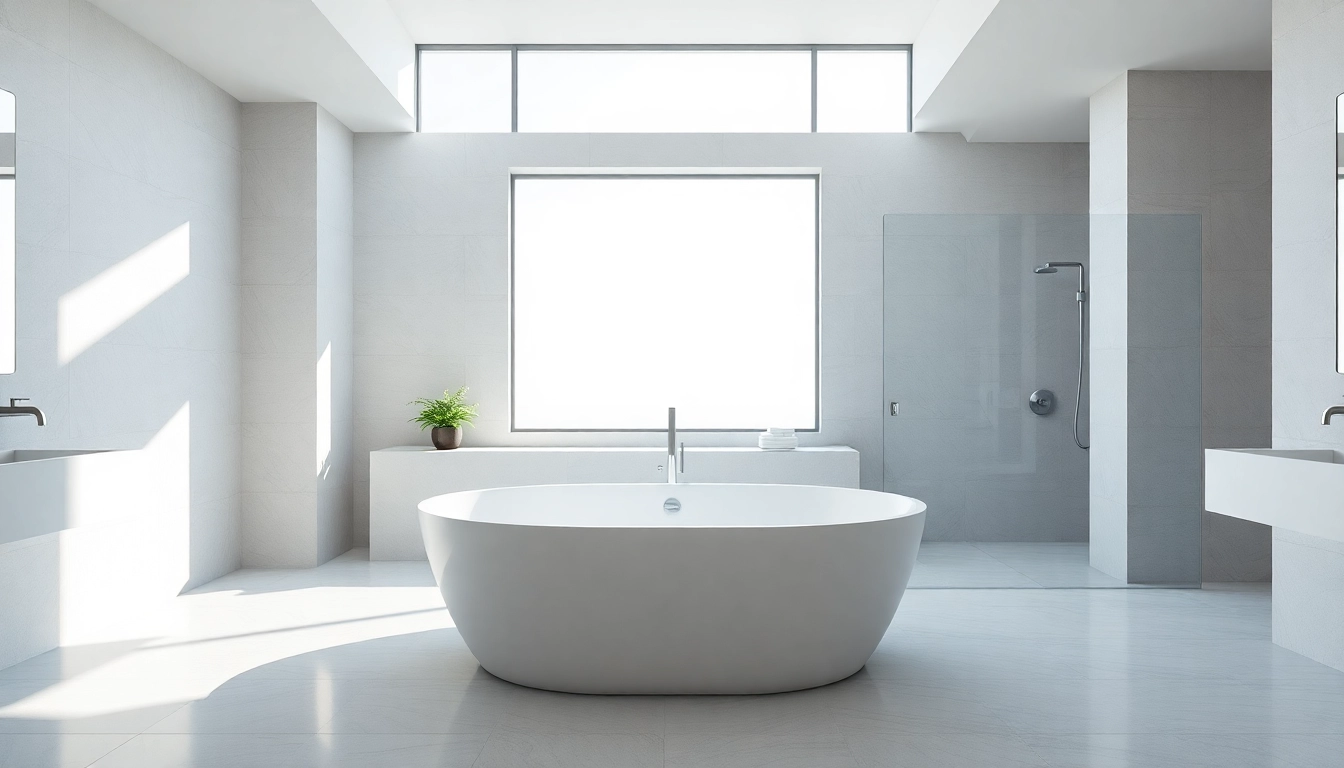
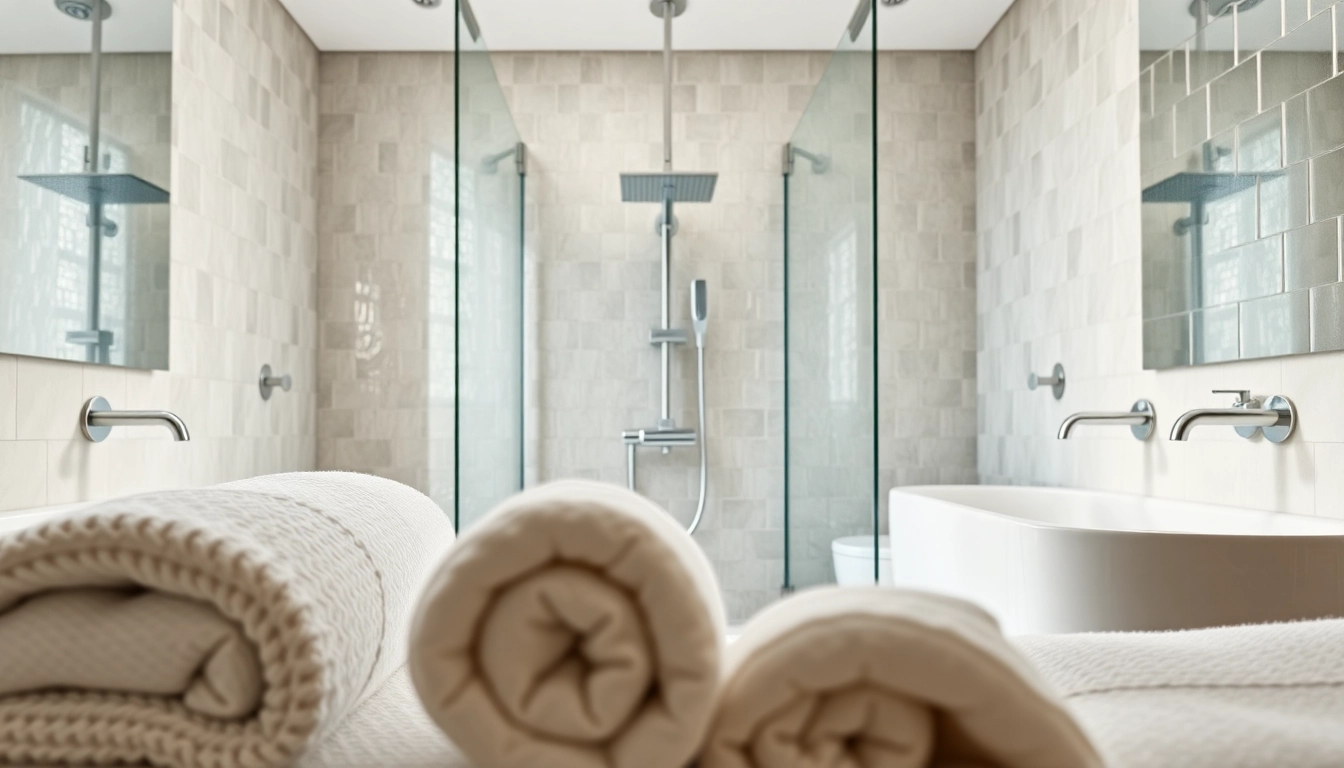
  • Innovative Design: Clean lines, minimalist aesthetics, and custom installations create an inviting atmosphere.
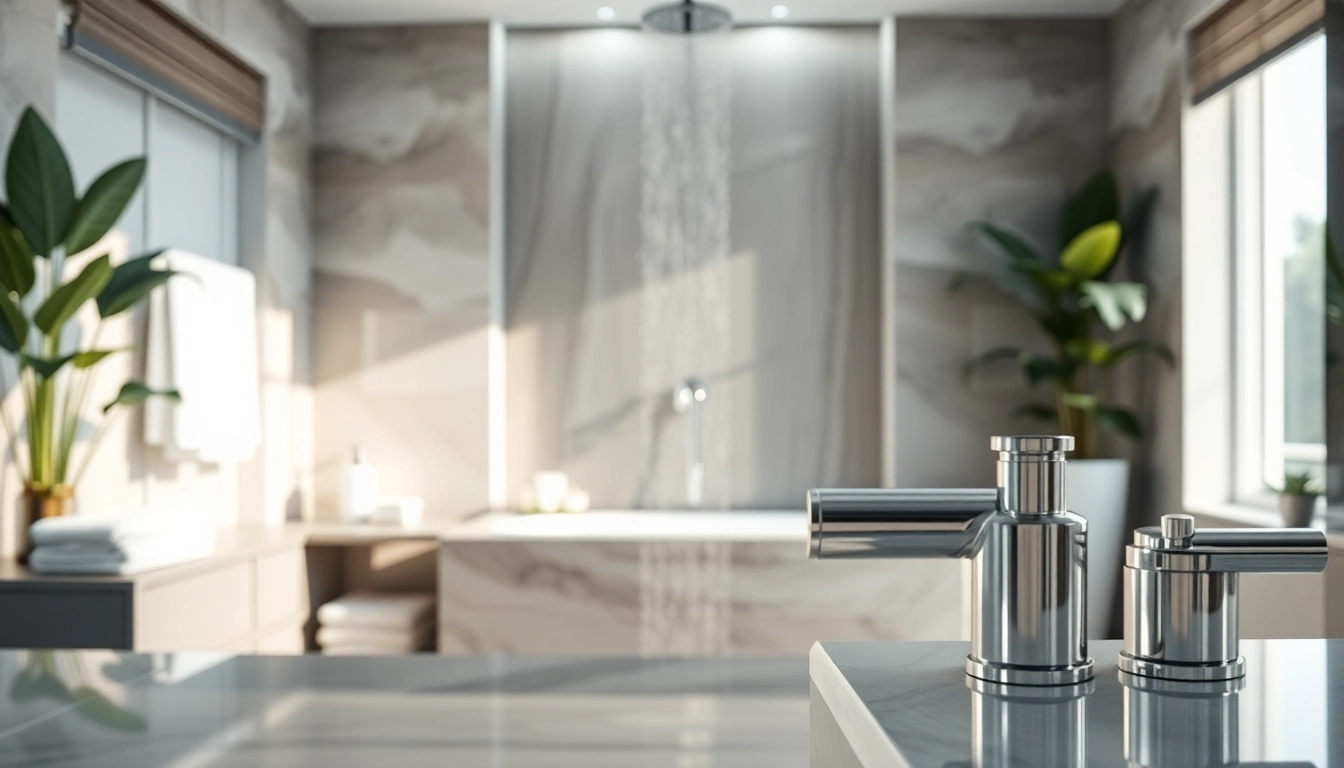
  • Advanced Features: Integrated technologies such as rainfall showerheads, digital controls, and multi-jet systems cater to varying preferences, culminating in a luxurious experience.
  • Personalization: Tailoring the shower to fit individual tastes, from color schemes to added features, allows homeowners to express their unique style while enjoying the convenience.

Benefits of Choosing Elegant Showers au

Opting for elegant showers au comes with a portfolio of benefits that elevate the bathroom experience:

  • Enhanced Aesthetics: An elegant shower can significantly improve the overall look and feel of your bathroom, turning it from a mundane space into a spa-like retreat.
  • Increased Home Value: A well-designed shower is an attractive feature for potential buyers, making it a worthy investment that can yield high returns.
  • Improved Hygiene: Modern shower designs often emphasize ease of cleaning, contributing to better hygiene standards without compromising style.
  • Efficient Water Use: With innovations in showerhead technology, elegant showers can save water while delivering a powerful spray, promoting an eco-friendly approach.

Design Options and Features

When exploring the range of design options and features available for elegant showers au, consider the following aspects:

  • Showerhead Types: From handheld to rain showerheads, each type offers something unique in terms of pressure and coverage.
  • Accessibility Features: Features such as grab bars and non-slip flooring cater to a broader audience, ensuring the elegant shower meets universal design standards.
  • Lighting: Integrating ambient and task lighting can transform the shower space, allowing you to create a soothing atmosphere or spotlight your design’s exceptional features.
  • Storage Solutions: Built-in niches and shelving provide functional yet stylish alternatives for storing shower essentials.

Picking the Right Features for Your Elegant Showers au

Choosing the perfect features for your elegant shower involves understanding your preferences, lifestyle, and the available technology. Here are critical areas to consider when curating your ideal shower space.

Showerhead Types and Their Benefits

The showerhead plays a pivotal role in your shower experience. Different types of showerheads come with unique advantages:

  • Rain Showerheads: These provide a luxurious, spa-like experience with a wide coverage area and gentle rain-like flow.
  • Handheld Showerheads: Versatile and practical for activities like rinsing off or washing children and pets.
  • Multi-Function Showerheads: Offering numerous spray patterns, these allow users to customize their shower according to personal preference.
  • Water-Saving Showerheads: A greener, budget-friendly option that can help reduce water consumption without sacrificing performance.

Smart Shower Technology: Pros and Cons

Smart shower technology is evolving swiftly. Here are some advantages and possible drawbacks to consider:

Pros:

  • Customization: Control water temperature and flow with precision, enhancing comfort for every user.
  • Water Usage Monitoring: Many smart systems allow users to track their water usage and make adjustments for savings.
  • Integration with Home Systems: Smart showers can sometimes link with other smart home devices for added convenience.

Cons:

  • Initial Cost: Investment in smart technology may be higher than traditional options.
  • Reliability: Dependence on technology can lead to potential malfunctions that affect the shower experience.

Budgeting for Your Elegant Showers au

Budgeting for your elegant shower is essential to ensure you achieve your desired aesthetic and functionality without overspending. Here’s how to strategize:

  • Determine Your Needs: Assess your showering habits and prioritize the features that matter most to you.
  • Factor in Installation Costs: Depending on whether you opt for DIY installation or hire professionals, costs will vary.
  • Set Aside for Long-Term Maintenance: Consider the costs for regular maintenance, repairs, and potential upgrades over time.
  • Explore Financing Options: If costs appear daunting, various financing plans can facilitate affordability, enabling you to invest in quality.

Installation Tips for Elegant Showers au

Installing your elegant shower can be a rewarding project that adds value and comfort to your home. Here’s a guide on how to go about it:

DIY vs. Professional Installation

Deciding whether to take a DIY approach or hire professionals depends significantly on your skill level and project complexity:

  • DIY Installation: A viable option for those with basic plumbing knowledge, helping to save costs. It’s great for smaller renovations.
  • Professional Installation: Ideal for complex setups, ensuring correct fittings and compliance with local codes, which is crucial for larger renovations.

Essential Tools Needed for Installation

If you choose to install your own elegant shower, prepare with the following tools:

  • Adjustable wrench
  • Pliers
  • Screwdriver set
  • Measuring tape
  • Level
  • Plumbing sealant and tape

Common Installation Mistakes to Avoid

As you embark on your installation journey, keep these common pitfalls in mind:

  • Ignoring Water Pressure: Ensure your residential water pressure is adequate for the shower system you’re installing.
  • Neglecting Sealing: Failing to use proper sealants can lead to leaks and damage. Prioritize effective sealing strategies.
  • Forgetting Ventilation: Proper ventilation during installation can prevent moisture-related mold growth post-installation.

Maintaining Your Elegant Showers au

Maintaining your elegant shower is critical for longevity and performance. Regular care can prevent issues and keep your space looking fresh and inviting.

Regular Cleaning and Care Tips

To keep your shower in optimal condition, consider the following maintenance practices:

  • Daily Rinsing: Rinse the walls and fixtures after each use to minimize soap scum build-up.
  • Use Mild Cleaners: Avoid harsh chemicals that can damage surfaces. Opt for gentle, pH-balanced cleaners instead.
  • Inspect Fixtures: Regularly check for signs of wear and tear or leaks, addressing issues promptly to prevent further damage.

Addressing Common Issues

Common shower problems can generally be prevented by proactive maintenance, but should they arise, here’s how to handle them:

  • Low Water Pressure: Check for potential clogs in the showerhead or plumbing, and clear them as necessary.
  • Leaky Fixtures: Most leaks can be fixed by tightening fittings or replacing worn washers.
  • Mold Growth: In case of mold, use a suitable cleaner and ensure proper ventilation to prevent recurrence.

Upgrading Parts for Longevity

As time passes, consider upgrading elements in your shower to enhance its performance:

  • Showerheads: Replacing old showerheads with efficient models can improve water flow and reduce consumption.
  • Water Filtration Systems: Introducing a filtration system can enhance water quality, reducing mineral build-up in pipes and fixtures.
  • Controls and Valves: Upgrading these parts can provide greater precision and convenience in water temperature and flow management.

FAQ: All You Need to Know About Elegant Showers au

What are elegant showers au?

Elegant showers au refer to high-quality, aesthetically pleasing showers that combine style with functionality, often featuring advanced technology and design options.

How do I choose the best features for my shower?

To choose the best features, assess your preferences, needs, and water pressure, focusing on showerhead types, control systems, and any accessibility options.

Can I install elegant showers au myself?

Yes, if you have basic plumbing skills, you can consider a DIY installation. However, complex systems may require professional help to ensure safety and compliance.

What maintenance do elegant showers au require?

Regular cleaning, inspection for leaks, and prompt treatments for issues like mold are critical for maintaining your shower’s functionality and aesthetics.

What budget should I consider for elegant showers au?

Budgeting for elegant showers can vary widely based on design, features, and installation costs. Plan for both initial investments and long-term maintenance expenses.

Demonstrating professional spray foam removal process in a bright home setting.

Effective Strategies for Professional Spray Foam Removal in Your Home

Introduction to Professional Spray Foam Removal

Spray foam insulation is a popular choice for homeowners looking to improve energy efficiency. However, there are circumstances where this material needs to be removed, leading many to seek professional spray foam removal services. Understanding when and why to remove spray foam is crucial for maintaining the integrity and safety of your home. This article delves into the nuances of spray foam removal, offering comprehensive insights for homeowners.

What is Spray Foam and Why Remove It?

Spray foam insulation is created by mixing two materials—polyurethane and isocyanate—which, when sprayed, expand and harden, forming an insulating layer. While it provides excellent thermal resistance and air sealing properties, several factors can necessitate its removal. These include:

  • Damage to Structure: Over time, moisture or pests can compromise spray foam, leading to structural issues.
  • Health Concerns: Improper installation or aging foam can release harmful chemicals, presenting health risks.
  • Renovation Needs: If you’re updating a room or changing its layout, existing foam may obstruct the process.
  • Improper Installation: Incorrect application can lead to thermal bridging or energy inefficiency, necessitating removal.

Signs You Need Professional Spray Foam Removal

Recognizing the signs that indicate the need for professional spray foam removal can save homeowners from severe repercussions:

  • Visible deterioration or discoloration of the foam.
  • Unpleasant odors signaling off-gassing or chemical reactions.
  • Signs of water damage or mold growth within or around the foam.
  • Increased energy bills indicating poor insulation performance.
  • Structural movement or instability that could be linked to compromised insulation.

Benefits of Timely Removal

Engaging in timely professional spray foam removal can lead to several benefits:

  • Improved Indoor Air Quality: Removing harmful residues helps maintain a healthier environment.
  • Preservation of Property Value: Keeping your insulation intact and functional can improve resale value.
  • Compliance with Building Codes: Ensures that your home remains within safety regulations.
  • Enhanced Energy Efficiency: By addressing insulation issues promptly, you can better manage heating and cooling costs.

Preparing for Professional Spray Foam Removal

Before the removal process begins, preparation is crucial for a smooth and efficient operation.

Assessing the Area Needing Removal

Professionals begin by assessing the spray foam’s condition and identifying the extent of removal required. This involves:

  • Checking for moisture issues.
  • Inspecting surrounding structural elements.
  • Identifying any potential hazards.
  • Determining whether there are any electrical or plumbing concerns that may be impacted.

Gathering Necessary Tools and Equipment

Professional spray foam removal requires specialized tools that can handle the unique properties of the material. Key tools include:

  • Heat guns to soften foam for easier removal.
  • Scrapers and cutting tools for precise extraction.
  • Industrial vacuums to collect debris and dust.
  • Personal protective equipment (PPE) such as gloves, goggles, and respirators.

Safety Precautions to Consider

Safety is paramount during the removal process. Precautions to take include:

  • Using proper ventilation in the work area.
  • Ensuring all electrical systems are deactivated.
  • Implementing a dust control plan to minimize airborne contaminants.
  • Conducting a risk assessment before starting work.

Steps Involved in Professional Spray Foam Removal

The removal process itself is intricate and requires careful execution to avoid damage to surrounding structures.

Initial Assessment and Planning

The first step involves a thorough assessment to determine the removal strategy. Professionals will create a detailed plan, outlining:

  • The type of foam needing removal.
  • Access points to the affected areas.
  • Timeframe and resource allocation.
  • Post-removal strategies for restoration.

Detailed Removal Techniques

Removal techniques can vary based on the foam type and its condition. Common practices include:

  • Scraping: Manually scraping away the foam using specialized tools.
  • Heating: Using heat guns to soften the foam before scraping.
  • Shaving: Employing industrial-grade shavers designed to cut through foam efficiently.

Post-Removal Cleanup and Maintenance

Once removal is complete, cleanup is essential to ensure safety and cleanliness:

  • Dispose of foam residues in accordance with local regulations.
  • Restore the work area, including repairing any damage caused during removal.
  • Conduct air quality assessments to ensure a safe environment post-removal.

Common Challenges in Spray Foam Removal

Homeowners may face several challenges during the spray foam removal process. Understanding these challenges can help in effectively addressing them.

Dealing with Stubborn Foam Residues

Some spray foams are notoriously difficult to remove. Common strategies include:

  • Applying solvents or chemicals specifically designed for foam breakdown.
  • Employing heated techniques to make the foam more pliable.
  • Utilizing high-powered tools for efficient extraction.

Safety Risks and How to Manage Them

Risks can arise from improper handling of materials and equipment, including:

  • Chemical Exposure: Using PPE can mitigate risks related to inhaling harmful vapors.
  • Physical Injury: Ensure the use of ergonomic tools to prevent strain and injury.
  • Environmental Concerns: Follow ecological best practices for disposal to safeguard the environment.

Cost Implications of Unprofessional Removal

Attempting to remove spray foam without professional expertise can lead to significant costs due to:

  • Potential damage to structures requiring costly repairs.
  • Increased long-term maintenance expenses from improper removal.
  • The need for follow-up inspections to ensure safety compliance.

Frequently Asked Questions about Professional Spray Foam Removal

How long does professional spray foam removal take?

The duration of professional spray foam removal can vary widely, often ranging from a few hours to a few days, depending on the area and extent of the foam involved.

Is professional spray foam removal safe?

Yes, when performed by experienced professionals using appropriate safety equipment and procedures, spray foam removal is safe for both workers and homeowners.

Can I do the removal myself?

While DIY removal is possible, it is generally not recommended due to safety risks and the potential for ineffective removal, leading to further issues.

What tools are needed for spray foam removal?

Essential tools for spray foam removal include heat guns, scraping tools, industrial vacuums, and personal protective equipment, ensuring a thorough and safe process.

How much does professional spray foam removal cost?

The cost can vary based on several factors, including the size of the area and the complexity of the removal, but it is typically an investment in the safety and efficiency of your home.

Erleben Sie die elegante sonni Duschkabine im modernen Badezimmer mit geschmackvollem Design.

Die Vorteile der sonni Duschkabine für Ihr Badezimmer

Einleitung zur sonni Duschkabine

Die Wahl der richtigen Duschkabine kann entscheidend für den Komfort und die Funktionalität Ihres Badezimmers sein. Eine der innovativsten Optionen auf dem Markt ist die sonni Duschkabine, die nicht nur für ihr ansprechendes Design, sondern auch für ihre vielseitigen Funktionen bekannt ist. Doch was genau macht diese Duschkabine so besonders? In den folgenden Abschnitten werden wir die Merkmale, Vorteile und Designelemente der sonni Duschkabine eingehend untersuchen.

Was ist eine sonni Duschkabine?

Die sonni Duschkabine ist eine moderne Lösung für das Badezimmer, die ästhetische Ansprüche mit Funktionalität vereint. Sie ist mit verschiedenen Technologien ausgestattet, um ein optimales Duscherlebnis zu gewährleisten. Ob für kleine Badezimmer oder geräumige Wellness-Oasen, die sonni Duschkabine bietet für jedes Bedürfnis die passende Lösung.

Besondere Merkmale der sonni Duschkabine

  • Hochwertige Materialien: Die sonni Duschkabine wird aus robustem, wasserabweisendem Glas und widerstandsfähigem Kunststoff gefertigt, die sowohl Langlebigkeit als auch einfache Reinigung gewährleisten.
  • Flexible Größen: Sie ist in verschiedenen Größen und Konfigurationen erhältlich, was eine einfache Anpassung an die Gegebenheiten des Badezimmers ermöglicht.
  • Innovative Technologien: Funktionen wie antikalkbeschichtete Oberflächen und energiesparende Beleuchtung sorgen für zusätzliche Benutzerfreundlichkeit und Komfort.

Vorteile der Nutzung

Die Entscheidung für eine sonni Duschkabine bringt verschiedene Vorteile mit sich. Zum einen sorgt sie für einen eleganten Look im Badezimmer und schafft eine einladende Atmosphäre. Zum anderen ist sie besonders pflegeleicht, was Zeit und Mühe spart. Die Technologien zur Verhinderung von Wasseransammlungen tragen dazu bei, Schimmel und Kalkablagerungen zu reduzieren, was nicht nur die Pflege erleichtert, sondern auch die Lebensdauer der Duschkabine verlängert.

Design und Ästhetik

Moderne Gestaltungselemente

Das Design der sonni Duschkabine ist zeitgemäß und erfüllt höchste ästhetische Ansprüche. Mit klaren Linien und minimalistischen Elementen passt sie sich harmonisch in jede Badezimmereinrichtung ein. Besonders hervorzuheben ist die Option, die Duschkabine optional mit Glaswänden oder schlichten Vorhängen zu kombinieren, wodurch sie vielfältig eingesetzt werden kann.

Farbauswahl und Anpassungsoptionen

Ein weiteres Highlight der sonni Duschkabine ist die breite Palette an Farb- und Oberflächenoptionen. Kunden können wählen, ob sie eine klarglasige oder satinierten Oberfläche bevorzugen, und auch die Rahmenfarbe lässt sich individuell anpassen. Diese Flexibilität ermöglicht es, persönliche Vorlieben und den Stil des Badezimmers zu berücksichtigen.

Kombination mit anderen Badezimmermöbeln

Die sonni Duschkabine lässt sich hervorragend mit anderen Badezimmermöbeln kombinieren. Ob Waschtisch, Badewanne oder moderne Armaturen – ihre Designs harmonieren bestens miteinander und kreieren ein stimmiges Gesamtbild. Dies ist besonders wichtig, wenn es darum geht, ein einheitliches Wohlfühlambiente zu schaffen.

Installation und Pflege

Einbau einer sonni Duschkabine

Die Installation der sonni Duschkabine kann, abhängig von den baulichen Gegebenheiten, sowohl als DIY-Projekt als auch durch Fachkräfte erfolgen. Es wird empfohlen, die Montage von einem erfahrenen Installateur durchführen zu lassen, um sicherzustellen, dass alles ordnungsgemäß und dicht ist. Die Verpackung enthält eine detaillierte Anleitung, die alle Schritte erläutert.

Pflegehinweise für Langlebigkeit

Um die Langlebigkeit der sonni Duschkabine zu gewährleisten, sind regelmäßige Pflege und geeignete Reinigungsmittel entscheidend. Die Verwendung von milden, nicht scheuernden Reinigungsmitteln sowie die sofortige Wischreinigung nach dem Duschen verhindern Kalkablagerungen und Schimmelbildung.

Häufige Fehler bei der Installation vermeiden

Bei der Installation der sonni Duschkabine sind einige häufige Fehler zu vermeiden. Dazu gehören falsche Maße, unzureichende Abdichtungen und eine falsche Ausrichtung. Eine präzise Planung und das Befolgen der Montageanleitungen sind hier ausschlaggebend.

Preis-Leistungs-Verhältnis

Kosten der sonni Duschkabine im Vergleich

Die Investition in eine sonni Duschkabine mag initial höher erscheinen als bei günstigeren Modellen, doch die Qualität der Materialien und die Technologie rechtfertigen den Preis. Zudem sind die Betriebskosten aufgrund der erleichterten Pflege und langer Lebensdauer geringer.

Langfristige Einsparungen durch Qualität

Qualität zahlt sich aus. Die sonni Duschkabine ist darauf ausgelegt, eine lange Lebensdauer zu bieten, was die Notwendigkeit für häufige Ersatzkäufe und Reparaturen verringert. Auch in puncto Wasser- und Energieverbrauch bietet sie durch moderne Technologien erhebliche Einsparpotentiale.

Tipps für den Kauf

Beim Kauf einer sonni Duschkabine sollten Verbraucher auf wichtige Aspekte wie Größe, Materialqualität und zusätzliche Funktionen achten. Ein Vergleich von verschiedenen Modellen und Bewertungen kann helfen, die bestmögliche Entscheidung zu treffen. Zudem ist es ratsam, sich im Vorfeld über mögliche Anpassungsoptionen zu informieren.

FAQs zur sonni Duschkabine

Wie lange dauert die Installation einer sonni Duschkabine?

Die Installation einer sonni Duschkabine kann in der Regel innerhalb eines Tages erfolgen, abhängig von den individuellen baulichen Gegebenheiten und den Vorbereitungen.

Ist die sonni Duschkabine raumsparend?

Ja, die sonni Duschkabine ist in verschiedenen Größen erhältlich, die perfekt für kleine Badezimmer geeignet sind, ohne dabei auf Komfort zu verzichten.

Welche Garantie gibt es auf die sonni Duschkabine?

Die sonni Duschkabine kommt in der Regel mit einer Garantie von mehreren Jahren, was für ihre Qualität und Langlebigkeit spricht.

Wie reinige ich die Glasoberflächen?

Um die Glasoberflächen zu reinigen, sollten milde Reinigungsmittel und ein weiches Tuch verwendet werden, um Kratzer zu vermeiden und eine klare Sicht zu gewährleisten.

Kann ich die sonni Duschkabine anpassen?

Ja, die sonni Duschkabine bietet zahlreiche Anpassungsoptionen, wie verschiedene Größen, Farben und Oberflächen, damit sie sich optimal in Ihr Badezimmer integriert.

Enhance your space with elegant showers au, showcasing luxury and relaxation in a stylish bathroom.

Transform Your Bathroom with Elegant Showers au: Style and Functionality Combined

Introduction to Elegant Showers au

Transforming a bathroom is not merely about choosing a color palette or new accessories; it involves a holistic makeover that enhances both utility and aesthetics. When embarking on a journey to elevate your bathing experience, elegant showers au emerges as a quintessential option, promising both beauty and functionality in a single package. This article delves into the various dimensions of elegant showers, focusing on their design elements, material choices, installation processes, and more—creating a luxurious oasis within your home.

The Beauty of Shower Designs

The design of a shower can significantly influence the entire bathroom ambiance. Whether you’re leaning towards modern minimalism or classic elegance, a well-thought-out shower design can serve as a stunning focal point. Features like frameless glass doors, mosaic tiles, and luxurious fixtures create an inviting atmosphere and provide a variety of styles for you to express your unique personality and preferences.

Key Features to Consider

When selecting a shower, consider elements such as size, shape, and functionality. Walk-in designs are increasingly popular for their spaciousness and accessibility, while corner units may save space in compact bathrooms. Furthermore, water efficiency features can help reduce utility bills and environmental impact, making them a vital consideration.

Benefits of Elegant Showers

Beyond aesthetics, elegant showers offer substantial benefits. They can significantly increase a property’s value and provide a spa-like experience at home, enhancing relaxation and wellness. An exquisitely designed shower can also optimize water flow and temperature control, ensuring a comfortable bathing experience that caters to individual preferences.

Types of Elegant Showers au

Walk-in Showers

Walk-in showers create a seamless transition between the shower area and the rest of the bathroom. With no door barriers, they offer ease of access and a luxurious open feel. Customization options are virtually limitless, from various tile selections to elegant storage solutions, making them perfect for both small and spacious bathrooms alike.

Rain Showers vs. Handheld Showers

Choosing between rain showers and handheld showers depends on the desired experience. Rain showers provide a tranquil, enveloping sensation, mimicking natural rainfall. In contrast, handheld showers offer versatility, allowing for targeted cleaning and ease of use. An ideal solution can incorporate both, providing a comprehensive bathing experience catering to various needs.

Steam Showers for Home Spas

Steam showers have gained traction for their therapeutic benefits, transforming bathrooms into personal wellness retreats. They promote relaxation, can help with skin health, and improve overall well-being. These luxurious installations often come equipped with additional features such as aromatherapy and music systems, enriching the relaxation experience.

Best Materials and Finishes

Tile Choices for Durability and Style

The choice of tiles can profoundly influence both durability and aesthetics. Porcelain and ceramic tiles are excellent options for their water resistance and various design possibilities. Natural stones like granite or marble add luxurious touches, but require more maintenance. Sticking to high-quality materials ensures your elegant shower not only looks stunning but also stands the test of time.

Choosing Fixtures that Shine

Fixtures and fittings dramatically impact the functionality of your shower. Selecting high-quality, stylish taps and showerheads is crucial. Modern technology allows for energy-saving options that maintain water pressure while reducing usage. Aesthetically, finishes such as chrome, brushed nickel, or matte black can complement any design theme, providing that finishing touch of elegance.

Creating a Cohesive Look

Achieving a cohesive look throughout your bathroom requires careful planning. Color coordination between the tiles, fixtures, and decor can create a harmonious appearance. Integrated storage solutions such as built-in niches or shelving can enhance functionality while maintaining elegance. Pay attention to continuity in style and finishes to elevate your shower experience seamlessly.

Installation and Maintenance Tips

Preparing Your Bathroom for Installation

Before installing your new shower, it’s crucial to prepare adequately. Assess the plumbing and ensure it can handle the new fixtures. Additionally, clear the installation area of any obstructions, and make sure that the walls are adequately waterproofed. Planning the layout and ensuring all necessary materials are at hand will streamline the installation process.

Routine Maintenance for Longevity

Regular maintenance can extend the life of your elegant shower and ensure it retains its aesthetic appeal. Simple practices include cleaning tiles and fixtures regularly to remove soap scum or hard water stains. Inspecting grout and caulking for wear is essential and reapplying when necessary to prevent water infiltration, protecting underlying structures.

Finding Professional Help

While some may consider DIY installation, seeking professional help is often recommended for complex installed showers. Qualified plumbers and installers will ensure that your shower is set up correctly, comply with building codes, and can provide valuable insights on customization options tailored to your needs.

FAQs About Elegant Showers au

What is the average cost of a stylish shower?

The average cost can vary widely based on materials and installation complexity but typically ranges from $1,000 to $8,000 or more, depending on specific features and design.

How do I choose the right size shower for my space?

Measure your bathroom space to determine the maximum dimensions and ensure adequate clearance. Consider the surrounding fixtures and any specific design elements you wish to incorporate.

What maintenance is required for a rain shower?

Routine cleanings will prevent mineral buildup. Regularly check for leaks and ensure all connections are secure for optimal performance.

Can I install an elegant shower myself?

While DIY installation is possible, hiring professionals is advisable for best results, ensuring proper waterproofing and compliance with building codes.

What are the best lighting options for a shower area?

Consider recessed lighting or wall sconces for a modern touch. Use water-resistant fixtures to enhance safety and ambiance without compromising on style.

Stunning bath reconstruction featuring a freestanding tub in a serene setting.

Enhance Your Home with Effective Bath Reconstruction Techniques

Understanding Bath Reconstruction Essentials

What is Bath Reconstruction?

Bath reconstruction is a comprehensive renovation process aimed at updating or completely transforming a bathroom to enhance its functionality and aesthetics. This can range from simple cosmetic upgrades, such as repainting or replacing fixtures, to extensive alterations, including structural changes and the installation of new plumbing systems. The ultimate goal of a bath reconstruction project is to create a space that effectively meets the needs of its users while reflecting modern design trends.

Common Reasons for Bath Reconstruction

There are several key motivations behind bath reconstruction projects. Homeowners may seek to:

  • Upgrade Outdated Features: Bathrooms can quickly become outdated. Reconstruction allows for a modern look with contemporary materials and technology.
  • Improve Functionality: Many older bathrooms are not designed for everyday convenience, prompting changes to layout and fixtures to better suit current needs.
  • Increase Home Value: A beautifully renovated bathroom can significantly boost a property’s market appeal and value, making it a worthwhile investment for homeowners.
  • Address Structural Issues: Over time, water damage, mold, or other issues can compromise the integrity of a bathroom. Reconstruction allows homeowners to address these problems effectively.
  • Accommodate Lifestyle Changes: Families grow, and needs change. A bath reconstruction can cater to new life stages, such as adding child-friendly features or making a space accessible for the elderly.

Key Considerations Before Starting a Project

Before embarking on a bath reconstruction project, it is crucial to evaluate several factors:

  • Project Scope: Clearly define what you wish to achieve. Are you aiming for a complete overhaul or specific upgrades?
  • Budget: Establish a realistic budget that encompasses materials, labor, and unexpected costs.
  • Timeline: Determine how long the project may take and whether it coincides with your personal schedule.
  • Building Regulations: Familiarize yourself with local building codes that may affect your design and renovation process.
  • Style Preferences: Think about the aesthetic you desire and how it will fit with the rest of your home.

Planning Your Bath Reconstruction Project

Setting a Realistic Budget for Your Renovation

Creating a budget for bath reconstruction involves more than simply deciding how much you’re willing to spend. It requires a detailed analysis of all potential costs. Here’s a breakdown:

  • Labor Costs: Skilled labor is often the most significant percentage of your total budget. Rates may vary based on the complexity of the tasks.
  • Materials: Consider the costs of tiles, fixtures, vanities, plumbing supplies, and more. Selecting high-quality materials may save you money in the long run.
  • Contingency Fund: Set aside about 10-20% of your budget for unexpected expenses that may arise during the project.
  • Permits and Inspections: Factor in any costs associated with permits required by local regulations.

Essential Tools and Materials Needed

Having the right tools and materials is vital to the success of your bath reconstruction project. Key essentials include:

  • Tools: Common tools include a tape measure, level, tile cutter, drill, saw, and various hand tools for adjustments.
  • Materials: Durable and water-resistant materials such as ceramic tiles, paint, vanities, and eco-friendly fixtures should be prioritized.

Hiring Professionals vs. DIY Approaches

Deciding between DIY and hiring professionals is a significant consideration in bath reconstruction.

DIY: Taking on the project yourself can save money and provide a sense of accomplishment. However, certain tasks, particularly plumbing and electrical work, require professional expertise.

Hiring Professionals: Contractors bring experience, efficiency, and access to high-quality materials and tools. However, it can significantly increase project costs. Consider getting multiple estimates and checking references.

Design Ideas for Bath Reconstruction

Contemporary Styles to Consider

When it comes to designing your new space, a few contemporary styles can elevate the functionality and look of your bathroom:

  • Minimalist: Focuses on sleek lines and understated elegance, using neutral colors and simple fixtures.
  • Industrial: Emphasizes raw materials like metal and concrete, paired with modern amenities for a unique aesthetic.
  • Scandinavian: Bright, airy spaces characterized by light woods, functional designs, and pastel colors.

Maximizing Space in Smaller Bathrooms

Utilizing every square inch in a compact bathroom is crucial. Techniques include:

  • Wall-mounted Fixtures: Save floor space and create an illusion of openness with wall-mounted sinks and toilets.
  • Smart Storage Solutions: Incorporate built-in shelves, medicine cabinets, and under-sink storage to keep clutter at bay.
  • Light Colors: Use light color palettes to make the room appear larger and brighter. Mirrors can also create an illusion of space.

Integrating Eco-friendly Products

Incorporating eco-friendly products not only benefits the environment but can also reduce utility bills. Consider:

  • Low-flow Fixtures: Install faucets and showerheads that reduce water usage while maintaining pressure.
  • Energy-efficient Lighting: Use LED lighting for energy savings and a longer lifespan.
  • Recycled Materials: Use tiles and fixtures made from recycled materials to minimize environmental impact.

Implementation Steps for Successful Bath Reconstruction

Demolition and Preparation Guidelines

The demolition phase sets the stage for the entire project. Key steps include:

  • Ensure you have the appropriate permits.
  • Shut off all utilities connected to the bathroom, such as water and electricity.
  • Carefully remove old fixtures, tiles, and cabinetry with a focus on minimizing damage to surrounding areas.
  • Prep the room by cleaning it and assessing the state of the plumbing and electrical systems.

Installing Fixtures and Finishes

With the old layout cleared, it’s time to install new fixtures:

  • Start with larger fixtures like the bathtub, shower, and toilet before moving on to sinks and cabinetry.
  • Ensure each component is plumbed properly and tested for leaks.
  • Finish with tiling, painting, and the installation of accessories like mirrors and towel racks for a complete look.

Final Touches for a Polished Look

Once installation is complete, add the final details that make the difference:

  • Accessorize with decorative items that reflect your style.
  • Ensure all elements work harmoniously together for a cohesive aesthetic.
  • Perform a thorough clean-up to ensure that the new bathroom is inviting and ready for use.

Maintenance Tips Post-Bath Reconstruction

Cleaning and Care for Longevity

Maintaining your new bathroom requires regular cleaning and care:

  • Use non-abrasive cleaners to avoid damaging surfaces.
  • Regularly check caulking and grout for cracks and replace as needed to prevent water damage.
  • Ensure fixtures are clean and free of mineral build-up by using vinegar or specialized cleaners.

Troubleshooting Common Issues

After reconstruction, certain problems may arise. Common issues include:

  • Leaks: Identify and fix leaks from pipes or fixtures immediately to prevent damage.
  • Mold Growth: Ventilate the bathroom properly and use mold-resistant materials to combat this issue.
  • Water Pressure Problems: Address any drops in water pressure with a plumbing inspection.

Seasonal Maintenance Checklist

In addition to regular upkeep, seasonal checks can sustain your bathroom’s condition:

  • Inspect plumbing for any issues, especially before winter when water can freeze.
  • Clear drains to prevent backups, particularly in autumn when leaves and debris gather.
  • Check for signs of wear on caulk and grout and reapply as necessary.

FAQ:

  • What is the average cost of bath reconstruction? The cost typically ranges based on the complexity of the project, materials used, and labor costs.
  • How long does a bath reconstruction project usually take? Projects can vary significantly, but most take between a few days to a couple of weeks to complete.
  • Can I undertake bath reconstruction as a DIY project? While some tasks are feasible for DIY enthusiasts, professional help is recommended for plumbing and electrical work.
  • What are popular materials for bath reconstruction? Common choices include ceramic tiles, natural stone, and water-resistant materials that offer durability and style.
  • How do I choose the right contractor for bath reconstruction? Seek recommendations, check reviews, and ensure they have experience specifically with bath renovations.

For more detailed information on how to undertake a successful bath reconstruction, continue exploring resources that provide professional insights and guidance tailored to your renovation journey.

Showcasing colonial home construction features in a serene suburban environment.

Crafting Timeless Charm: The Essentials of Colonial Home Construction

Understanding Colonial Home Construction

Colonial home construction reflects a unique architectural style that has impressed homeowners and builders alike for generations. Renowned for its historical significance and timeless appeal, this style is rooted deeply in American history. If you’re considering embarking on a journey toward a colonial home construction, understanding its intricate details is essential.

Defining Colonial Architecture

Colonial architecture is characterized by its symmetrical design, linear proportions, and classic detailing. Originating from the colonial period when European settlers established their homes in North America, this architectural form showcases the artisanship and materials of that era. Typical features include a central front door framed by windows, steep roofs, and brick or wooden façades. The simplicity and symmetry of colonial homes evoke a sense of harmony, making them timeless and desirable.

History and Evolution of Colonial Homes

The inception of colonial homes dates back to the early 17th century, as settlers brought their own architectural styles from Europe, leading to various regional adaptations. For instance, the Cape Cod style, prevalent in New England, features steep roofs and dormer windows to withstand harsh weather, while the Southern Colonial style boasts grand columns and expansive balconies suitable for warm climates. Over time, these designs evolved, integrating local materials and climate considerations, contributing to the diverse range of colonial homes we see today.

Key Characteristics of Colonial Home Construction

The key characteristics that define colonial home construction include:

  • Symmetry: Most colonial homes feature a balanced design that reflects order and proportion.
  • Geometric Shapes: The use of simple geometric shapes is prevalent, creating a straightforward and functional aesthetic.
  • Large Windows: Colonial homes commonly have double-hung windows that provide plenty of natural light, reinforcing their elegance.
  • Porches and Entrances: Grand porches or porticos with columns are often prominent, acting as a welcoming central feature of the façade.

Design Elements in Colonial Home Construction

Exterior Design Features

The exterior of a colonial home is marked by its stately appearance and classic detailing. Brick facades, clapboard panels, and natural stone are frequently employed materials, providing durability and aesthetic appeal. Roof styles often range from gable to hipped designs, enhancing the home’s overall silhouette. Furthermore, colonial homes celebrate open-air designs, with well-placed windows to create a visual connection with the surrounding landscape.

Interior Layout and Flow

Inside, colonial homes are notably characterized by their functional layouts. The central hallway typically divides the primary living spaces, leading to strategically placed rooms that provide an efficient flow. The living room, dining area, and kitchen are often located adjacent to each other, promoting accessibility and fluidity. Additionally, fireplaces play a central role in these homes, historically serving as both a heat source and a focal point for gathering.

Color Schemes and Materials

Color palettes for colonial homes are often rooted in historical significance, favoring muted tones inspired by nature. Colors such as deep greens, soft neutrals, and classic whites create an inviting atmosphere. Materials used in colonial home construction can include wood, brick, and stone, highlighting craftsmanship and tradition. The careful selection of materials and colors aligns the home with its historical roots while allowing for personalization to fit modern tastes.

Choosing the Right Location for Colonial Home Construction

Assessing Neighborhoods

Location is crucial when planning colonial home construction. Historical neighborhoods often showcase colonial architecture, providing context and aesthetic continuity. It’s advisable to assess the demographics and overall vibe of potential neighborhoods. Consider factors like local amenities, schools, and community services to ensure the environment meets your family’s needs.

Environmental Considerations

Building a colonial home requires careful consideration of environmental factors. Utilizing sustainable practices and materials can significantly impact the overall footprint of the construction. Assessing the plot’s natural features—like tree cover, geography, and sunlight exposure—can inform intelligent design decisions that enhance energy efficiency and reduce environmental impact.

Proximity to Amenities

Proximity to schools, shopping centers, parks, and healthcare facilities should also play a significant role in choosing your site. A well-located home enhances your lifestyle and ensures easy access to essential services. In addition, consider future growth potential of the area and how it may impact property value over time.

Building Regulations and Colonial Home Construction

Understanding Local Codes

Before you begin construction, understanding local building codes is imperative. Each municipality has its own regulations regarding construction standards, zoning laws, and safety requirements. Familiarizing yourself with these codes will help you avoid legal complications and ensure that your home is both safe and compliant.

Permits and Approvals

Obtaining the necessary permits is a critical step in any construction project. Check with local authorities regarding the types of approvals required for colonial home construction, which may include zoning permits and building permits. Acquiring the correct permits ensures that the project can proceed without interruptions.

Working with Architects and Contractors

Collaboration with seasoned architects and contractors who specialize in colonial home constructions will streamline your building process. These professionals can offer invaluable insights, navigate building codes efficiently, and manage the execution of your vision. Their expertise ensures a smooth workflow and adherence to design concepts.

Cost Analysis and Budgeting for Colonial Home Construction

Estimating Construction Costs

Estimating costs for colonial home construction involves evaluating various components, including land acquisition, materials, labor, and permits. It’s essential to create a detailed budget that accounts for unexpected expenses. Engaging a financial advisor or a construction specialist can help provide accurate cost assessments tailored to your project.

Financing Options for Home Builders

Exploring financing options is crucial when planning your budget. Traditional mortgages, construction loans, or personal loans are viable options. Consult with financial institutions to gauge what financing best suits your financial situation. Consider the costs associated with each option to make informed decisions.

Long-term Investment Value

Investing in colonial home construction may serve as a long-term asset. These homes typically hold their value better due to their timeless appeal and substantial craftsmanship. Factors such as location, neighborhood desirability, and maintenance contribute to the home’s long-term investment value, making this style a wise choice for many.

Frequently Asked Questions

What makes colonial homes different from other styles?

Colonial homes stand out due to their symmetry, simplicity, and use of classic materials. Their historical roots and architectural details contribute to a timeless appeal compared to more modern designs.

How can I ensure my colonial home respects historical accuracy?

Collaborate with architects who specialize in historical architecture and research the colonial style you want to replicate. Prioritize traditional materials and features to ensure authenticity.

What environmental considerations should I take into account?

Consider energy efficiency and sustainable materials when constructing a colonial home. Utilize natural resources wisely and assess land features for the best footprint.

Are colonial homes more expensive to build than modern ones?

Colonial homes can be more costly due to the traditional craftsmanship and materials required. However, their long-term value typically offsets initial investment costs.

How can I customize a colonial home without losing its essence?

Customization can include thoughtful additions or modern amenities while preserving classic elements. Focus on maintaining foundational architectural details while integrating contemporary conveniences.

Enhance your home with Cabinet Refacing Largo FL for a modern kitchen makeover.

Revitalizing Your Space with Cabinet Refacing Largo FL: A Comprehensive Guide

Understanding Cabinet Refacing Largo FL

What is Cabinet Refacing?

Cabinet refacing is a transformative process that revitalizes your kitchen or bathroom without the extensive cost and hassle of complete cabinet replacement. In this procedure, the existing cabinetry structure remains intact while the outer surfaces are updated with new materials such as wood, laminate, or veneers. This approach can effectively change the appearance of your cabinets, giving them a fresh and modern look while preserving their functional framework. This makes cabinet refacing an attractive option for homeowners seeking to enhance their spaces economically and efficiently. For comprehensive service details for Cabinet Refacing Largo FL, consider exploring local solutions.

Benefits of Cabinet Refacing

  • Cost-Effective: Refacing is significantly less expensive than a full cabinet remodel, as it utilizes the existing cabinet structures, reducing materials and labor costs.
  • Time-Saving: The process of refacing can often be completed in just a few days, making it a quicker alternative to replacement.
  • Eco-Friendly: Refacing minimizes waste by reusing existing cabinets rather than discarding them, which is better for the environment.
  • Customization: Homeowners have the option to choose from a variety of styles, colors, and finishes to align with their aesthetic preferences.
  • Increased Home Value: Updated cabinets can enhance the overall appeal of your home, making it more attractive to potential buyers.

Differences Between Refacing and Replacing

Understanding the distinction between refacing and replacement is crucial for making informed decisions about your kitchen or bathroom renovation. Refacing involves updating only the exterior of the cabinets, whereas replacing entails removing and discarding the entire cabinetry system. The refacing process provides a new look while maintaining the existing frames, making it a sustainable option. In contrast, replacement can be more disruptive, time-consuming, and expensive, requiring complete removal and installation of new cabinetry.

Preparing for Your Cabinet Refacing Project

Assessing Your Current Cabinets

The first step in preparing for a cabinet refacing project involves evaluating the condition of your current cabinets. Look for signs of wear and tear, such as scratches, dents, or water damage. Also, ensure that the structural integrity of the cabinets is solid. If the cabinets are sturdy, refacing is an ideal solution to refresh their look. Consider the layout and functionality of your kitchen or bathroom as well. A well-planned assessment will help you make informed decisions about the style and materials for your refacing project.

Choosing the Right Materials

When selecting materials for your cabinet refacing project, consider both aesthetics and durability. High-quality veneers, laminates, or solid wood can provide a beautiful finish. It’s essential to choose materials that complement your home’s overall design and withstand daily wear. Additionally, consider the texture and finish, whether you prefer a matte, glossy, or textured look. Proper material selection not only enhances the appearance but also contributes to the longevity of your cabinets post-refacing.

Budget Considerations

Establishing a budget is vital when planning your cabinet refacing project. Depending on the scope of work, costs can vary widely. On average, homeowners can expect to invest a fraction of what a full cabinet replacement would cost. It’s advisable to seek multiple quotes from different contractors, inquire about material prices, and account for labor costs. Be sure to set aside an additional contingency budget for unforeseen expenses that may arise during the project.

Step-by-Step Cabinet Refacing Process

Removing Existing Fixtures and Doors

The process begins with the careful removal of existing cabinet doors, drawers, and hardware. It is essential to handle these components gently to avoid damage. Documenting the process and labeling parts can facilitate easy reassembly later. Depending on the complexity, a professional can ensure that the removal is done correctly, preventing any misalignment or damage to the cabinet frame.

Applying New Veneer

Once the existing components are detached, the next step is to apply the new veneer or laminate to the cabinet frames. This process involves measuring, cutting, and adhering the veneer securely to ensure a seamless look. The application might require specialized tools and techniques, emphasizing the importance of hiring experienced professionals who can deliver a flawless finish that enhances the cabinet’s overall aesthetic.

Installing New Hardware

Finally, the new cabinet doors and drawers need to be fitted with new hardware, which includes knobs, handles, and hinges. When selecting hardware, consider the style and functionality that best suits your cabinets. The right hardware not only adds visual flair but also enhances the user experience. A well-executed installation adds a polished touch to the newly refaced cabinets and completes the transformation.

Design Ideas for Cabinet Refacing Largo FL

Color Trends and Finishes

Color selection plays a crucial role in the impact of cabinet refacing. Popular trends include bold colors like navy blue or emerald green, as well as classic shades like white and gray. Combining different finishes, such as matte and gloss, can create depth and interest. Additionally, consider incorporating a two-tone approach, where lower cabinets are painted in a bolder hue while upper cabinets remain neutral for a striking contrast.

Incorporating Unique Hardware

The right hardware can elevate the design of refaced cabinets remarkably. Opt for unique shapes, textures, or vintage-inspired pieces that reflect personal style. Hardware finishes like brushed nickel, gold, or matte black can also provide a modern touch. Customizing hardware can give cabinets a bespoke appearance, making them stand out as distinct features in your kitchen or bathroom.

Combining Styles for Personal Touches

Another way to personalize your cabinet refacing project is by incorporating different design styles. For example, combining modern sleekness with rustic wood accents can produce an eclectic and unique look. This approach allows homeowners to reflect their personality through design elements, creating a space that feels tailored and inviting.

Maintaining Your Refaced Cabinets

Cleaning Tips for Longevity

To preserve the beauty of your refaced cabinets, establish a routine cleaning regimen. Use a gentle cleanser and soft cloth to avoid scratching the surface. Avoid harsh chemicals and abrasive materials that can damage the finish. Regular cleaning not only keeps your cabinets looking great but also prolongs their lifespan and functionality.

Repairing Minor Damage

Accidents happen, and minor damages may occur over time. Be proactive in managing these issues by learning simple repair techniques. For scratches, a matching wood filler can be used to fill in imperfections. For deeper gouges, sanding and refinishing the affected area can restore the cabinet’s appearance. Maintaining a repair kit on hand can help address small problems quickly.

Periodic Maintenance Practices

In addition to regular cleaning and minor repairs, periodic maintenance checks are essential. Inspect hinges, handles, and joints for any wear or loose fittings. Adjustments may be necessary to keep doors aligned and functional. A little maintenance goes a long way in preserving the quality of your refaced cabinets for years to come.

Frequently Asked Questions

1. How long does cabinet refacing take?

Typically, cabinet refacing can take anywhere from a few days to a week, depending on the size of your project and the contractor’s schedule.

2. Can I customize the design of my cabinets during the refacing process?

Yes, cabinet refacing allows you to choose colors, finishes, and hardware to customize the look of your cabinets according to your style preferences.

3. Is cabinet refacing a DIY project?

While some homeowners may attempt DIY refacing, hiring professionals ensures a quality finish and reduces the risk of errors during the process.

4. What is the difference between laminate and veneer?

Laminate is a man-made material that offers a wide variety of colors, while veneer is a thin layer of real wood applied to surfaces for a natural look.

5. How often should I maintain my refaced cabinets?

Regular cleaning should be done monthly, while inspections and minor repairs should occur every six months to ensure they remain in good condition.

Cape Cod homes showcasing a beautiful attached garage amidst lush landscaping and bright sky.

Enhance Your Space: Unique Features of Cape Cod Homes

Introduction to Cape Cod Homes

Cape Cod homes are iconic structures that embody the charm and history of American architecture. Originating in the early 17th century in Massachusetts, these homes are known for their quaint simplicity and practicality. The traditional cape cod homes have evolved over the years, adapting to modern living while maintaining their distinctive appeal. This article delves deeply into the history, unique features, modern enhancements, challenges, and best practices surrounding Cape Cod homes, providing homeowners and architecture enthusiasts with valuable insights.

History and Architecture

The design of Cape Cod homes dates back to the colonial era. These structures were initially built by early settlers who sought shelter from the harsh New England winters and coastal storms. Characterized by their steep rooflines, symmetrical facades, and dormer windows, Cape Cod homes were efficient in shedding snow and maximizing living space. The style is a derivative of simple, functional design, influenced by the homes of 17th-century England. As time has passed, various adaptations have been made, retaining the core attributes while introducing modern elements, making Cape Cod homes highly sought after.

Distinctive Features of Cape Cod Homes

Cape Cod homes possess a set of distinctive features that set them apart from other architectural styles. Some key characteristics include:

  • Steep Pitched Roofs: This design facilitates snow and rain runoff, essential in the New England climate.
  • Symmetrical Facade: Usually balanced with windows on either side of the entrance, enhancing aesthetic appeal.
  • Dormer Windows: These provide additional lighting and space, often creating charming attic areas for extra living space.
  • Wooden Clapboard Siding: Traditionally painted in muted colors that blend with the natural surroundings.

Why Choose a Cape Cod Home?

Cape Cod homes offer numerous advantages that attract potential homeowners. Their classic design brings a sense of warmth and nostalgia, providing comfort and charm. Additionally, their energy-efficient characteristics, especially when modernized, keep utility costs low. The straightforward construction allows for various renovations and expansions, making it feasible for homeowners to customize their living spaces according to their needs. Furthermore, the timeless appeal of Cape Cod homes ensures they retain value over time, making them a solid investment.

Modern Enhancements to Traditional Cape Cod Homes

In recent years, homeowners have sought to modernize traditional Cape Cod homes without sacrificing their classic characteristics. By incorporating contemporary features, these timeless structures can meet modern living standards while preserving their nostalgic charm.

Expanding Living Spaces

As families grow, the need for additional living space becomes essential. Expanding a Cape Cod home can be achieved through various methods:

  • Adding a Sunroom: This can provide a bright, airy space connecting the indoors with the outdoors.
  • Building an Addition: Expanding into the yard can offer more bedrooms or larger common areas while matching the existing architectural style.
  • Finishing the Attic: Utilizing this space can create a cozy living area, office, or additional bedroom without altering the home’s exterior.

Innovative Garage Designs

Today’s homeowners often seek functionality in garage designs while ensuring they complement the aesthetics of Cape Cod homes. Innovative garage designs include:

  • Attached Garages: These are integrated into the home’s design, providing convenience and continuity in style.
  • Detached Garages: With creative landscaping and design, detached garages can serve as a stylish statement piece that doesn’t detract from the home.
  • Multi-Use Spaces: Garages that double as workshops or storage areas increase usability without compromising visual appeal.

Sustainable Features and Materials

Modern Cape Cod homeowners are increasingly focused on sustainability. Incorporating eco-friendly features and materials can enhance a home’s efficiency while preserving its character. Key considerations include:

  • Energy-Efficient Windows: Upgrading to double or triple-glazed windows drastically improves insulation and reduces energy consumption.
  • Sustainable Siding Options: Materials like fiber cement or reclaimed wood offer durability and aesthetic compatibility.
  • Solar Energy Systems: Roof-mounted solar panels can complement steep roofs without altering the iconic silhouette of Cape Cod homes.

Challenges Faced by Cape Cod Homeowners

While Cape Cod homes offer numerous benefits, homeowners must navigate certain challenges associated with this architectural style. Understanding these challenges helps in effective management and upkeep.

Weather and Climate Considerations

The coastal location of many Cape Cod homes exposes them to harsh weather conditions. Homeowners must consider appropriate protective measures such as:

  • Storm-Resistant Features: Installing impact-resistant windows and stronger roofing materials can safeguard against storms.
  • Elevated Landscaping: Ensuring that the landscaping directs water away from the foundation helps prevent flooding.
  • Regular Maintenance Checks: Routine inspections of roofs, siding, and gutters can help identify and rectify potential weather-related damage early.

Maintenance and Upkeep

Maintaining a Cape Cod home can be labor-intensive, especially considering the exposure to coastal elements. Key maintenance strategies include:

  • Exterior Painting: Regularly repainting not only preserves aesthetic appeal but protects the wood from rot and degradation.
  • Roof Inspections: Checking for wear and tear after harsh weather can prevent larger issues.
  • Foundation Checks: Ensuring that the foundation is stable and free from cracks, especially after heavy rains, is critical for structural integrity.

Managing Property Layout

A well-designed property layout enhances the functionality and flow of Cape Cod homes. Homeowners should focus on:

  • Maximizing Outdoor Spaces: Creating patios, gardens, and pathways ensures that the exterior complements the house.
  • Thoughtful Landscaping: Native plant selections and strategic placement can enhance the home’s visual appeal while promoting ecological balance.
  • Designated Activity Zones: Consideration of areas for kids, pets, and relaxation spots can optimize the functionality of the outdoor environment.

Best Practices for Cape Cod Home Design

Designing or renovating a Cape Cod home involves several best practices that align with both modern needs and traditional aesthetics. Following these practices helps enhance the home’s charm and functionality.

Landscaping Ideas for Your Cape Cod Home

Effective landscaping can add significantly to the charm and usability of Cape Cod homes. Some ideas include:

  • Native Plant Gardens: Utilizing native species ensures hardiness and reduces the need for excessive watering and maintenance.
  • Pathways and Patios: Using natural stone or wood for walkable areas can unify the outdoor space.
  • Ornamental Features: Adding benches, fountains, or sculptures can elevate the aesthetic appeal of gardens.

Interior Design Trends

Interior design in Cape Cod homes often reflects casual elegance, embracing comfort and functionality. Current trends include:

  • Open Layouts: Promoting connectivity among different spaces creates a welcoming and expansive feeling.
  • Neutral Color Palettes: Soft shades allow for versatility, often complemented with bold accent colors through furnishings or decor.
  • Natural Materials: Incorporating wood, stone, and textiles enhances the tactile experience and charm.

Choosing the Right Color Palette

The selection of an appropriate color palette is essential for maintaining the traditional aesthetic of Cape Cod homes while allowing for personal style. Consider the following:

  • Coastal Hues: Soft blues, greens, and sandy beiges embody the seaside feel.
  • Contrasting Trim: White or dark trim can accentuate the home’s architectural features.
  • Earthy Tones: Colors that reflect the surroundings harmonize with nature and create a calming atmosphere.

FAQs about Cape Cod Homes

What are the key characteristics of Cape Cod homes?

Cape Cod homes typically feature steep roofs, dormer windows, and symmetrical facades, offering both beauty and functionality.

How can I expand my Cape Cod home?

Consider adding an attached garage or extending your living space with a sunroom or deck that complements the house’s aesthetic.

What maintenance do Cape Cod houses require?

Regular maintenance includes painting, roof inspections, and checking the foundation, particularly due to weather impacts.

Are Cape Cod homes energy-efficient?

With proper insulation and modern updates, Cape Cod homes can be energy-efficient, significantly reducing heating costs.

What landscaping works best with Cape Cod homes?

Native plants, coastal grasses, and ornamental shrubs complement the style, enhancing the charm and character of your home.

Luxurious paver patio setting with family enjoying fire pit, ideal for paver companies near me.

Proven Paver Companies Near Me: Achieve Outdoor Elegance in 2026

Understanding the Basics of Paver Installation

Paver installation is a significant aspect of enhancing outdoor spaces, offering both aesthetic appeal and functional advantages. When considering how to elevate your property, understanding the fundamentals of pavers is essential. Whether you’re looking to create a welcoming patio, a functional walkway, or an elegant driveway, knowledge about pavers can significantly impact your choice and satisfaction. For those exploring options for their outdoor projects, Paver companies near me can provide comprehensive insights into materials, installation procedures, and design possibilities.

What are Pavers and Their Benefits?

Pavers are concrete, brick, or stone blocks used for paving surfaces such as driveways, patios, and walkways. Their popularity stems from several advantages:

  • Durability: Pavers are designed to withstand heavy loads and resist cracking.
  • Aesthetic Variety: Available in various textures, colors, and styles, they can complement any home design.
  • Installation Flexibility: Pavers can be arranged in numerous patterns, allowing for creative designs.
  • Low Maintenance: Regular cleaning and occasional sealing can keep pavers looking new for years.

Different Types of Pavers Available

There are several types of pavers available, each suited for different applications:

  • Concrete Pavers: These are the most common and come in various designs, colors, and shapes.
  • Brick Pavers: Known for their classic look, brick pavers provide a timeless aesthetic but may require more maintenance.
  • Natural Stone Pavers: Made from materials like granite, limestone, and slate, these pavers offer exquisite beauty and uniqueness at a higher price point.
  • Pervious Pavers: Designed to allow water infiltration, they help manage stormwater runoff effectively.

Key Factors Influencing Paver Costs

The cost of paver installation can vary greatly based on several factors:

  • Material Selection: Higher-quality materials will inevitably cost more.
  • Site Preparation: The existing condition of the installation site can impact labor costs; additional grading or excavation may be needed.
  • Design Complexity: Intricate designs require more planning and labor, increasing the overall cost.
  • Location: Costs can vary based on geographic region and local market conditions.

Finding Reliable Paver Companies Near Me

When it comes to hiring a professional for your paver installation, evaluating local services is essential. A quality contractor can ensure that your project is completed efficiently, on time, and within budget, resulting in an outdoor space you can be proud of.

Evaluating Local Paver Installation Services

To identify the best paver companies in your area, consider the following criteria:

  • Experience: Look for companies with at least five years of experience in paver installation.
  • Certifications: Ensure that the company is certified and authorized, like Arriaga Pavers, to guarantee quality work.
  • Portfolio: Review their past projects, looking for diversity and quality in their work.
  • Warranties: Ask about warranties on both workmanship and materials, which can safeguard your investment.

What to Look for in a Professional Contractor

Aside from evaluating credentials, consider the contractor’s approach to customer service:

  • Communication: A good contractor should be responsive and open to discussing your ideas and concerns.
  • References: Request references from previous clients to gauge satisfaction levels.
  • Estimates: Obtain multiple estimates; a reputable contractor will provide a transparent quote detailing labor and materials.

Insights from Customer Reviews and Testimonials

Word-of-mouth is invaluable in the contracting business. Online reviews can provide a sense of a company’s reliability and quality:

  • Positive Reviews: Frequent praises for quality work and customer service can point to a trustworthy company.
  • Consistent Feedback: Look for patterns in reviews, especially if multiple customers mention similar issues or strengths.

Common Paver Installation Challenges

While paver installation can enhance your property, it’s not without its challenges. Understanding these potential issues can help you prepare and mitigate risks effectively.

Soil and Drainage Issues

Soil stability is crucial for a successful installation. Poor drainage can lead to shifting or sinking pavers. Here are some considerations:

  • Soil Testing: Conduct soil tests to determine the composition and drainage capacity.
  • Drainage Solutions: Implement proper grading and drainage systems to divert water away from paved surfaces.

Weather-Related Concerns and Solutions

Paver installation can be impacted by weather conditions, especially during extreme heat or rain. Consider these strategies:

  • Optimal Scheduling: Plan installations during mild weather to avoid complications from heat or heavy rain.
  • Material Preparation: Ensure materials are acclimated to the environment prior to installation.

Budgeting for Unexpected Expenses

No project is completely predictable. Always budget for unexpected costs, which can arise from:

  • Site Preparation: Unforeseen issues such as large roots or underground utilities can increase labor and material costs.
  • Design Changes: Modifications to the project can lead to additional expenses; thus, having a flexible budget is beneficial.

Maximizing the Life of Your Paver Installations

Once your pavers are installed, it’s essential to maintain them properly to ensure their longevity and aesthetic appeal.

Routine Maintenance Tips for Paver Patios

Regular maintenance will keep your paver patio looking new:

  • Cleaning: Use a broom or pressure washer to remove dirt and debris periodically.
  • Sealing: Applying a sealant can protect against stains and enhance color.

Restoration Techniques for Aging Pavers

As pavers age, they may require restoration techniques to keep them functional:

  • Re-Sanding Joints: Adding polymeric sand can prevent weed growth and stability in paver joints.
  • Replacement: If individual pavers are damaged, replace them rather than the entire surface.

Seasonal Preparations for Paver Surfaces

Different seasons can pose unique challenges, so be prepared:

  • Winter Preparation: Avoid using rock salt on pavers; instead, opt for alternatives to prevent damage.
  • Summer Care: Ensure thorough cleaning before the peak heat to maintain appearance and safety.

Future Trends in Paver Design and Technology

The paver industry continues to evolve, influenced by design trends, technology, and sustainability.

Innovative Materials and Sustainable Options

New materials are enhancing the quality and environmental footprint of pavers:

  • Recycled Materials: Many companies now offer pavers made from recycled materials, reducing environmental impact.
  • Sustainable Manufacturing: Look for products that are manufactured with water-saving and energy-efficient processes.

Emerging Design Trends for 2026

As we move into 2026, several design trends are gaining traction:

  • Textured Surfaces: Pavers with rich textures can create visually appealing outdoor spaces.
  • Color Blending: Custom colors and blended pavers are trending for unique outdoor aesthetics.

Incorporating Technology in Outdoor Spaces

Technology is making its way into outdoor design, enhancing functionality:

  • Smart Lighting: Integrating smart lighting into paved areas can enhance safety and ambiance.
  • Drainage Solutions: Innovative systems are evolving for better stormwater management in paved areas.

What Should I Expect from a Paver Installation Project?

A typical paver installation project involves several stages, including consultation, design, installation, and final inspection:

  • Consultation: Discuss your vision and preferences with your contractor.
  • Design Plan: A detailed design plan will be created for your review and approval.
  • Installation: Professional installation will occur, ensuring adhering to safety and aesthetic standards.
  • Final Walkthrough: Inspect the completed project to ensure satisfaction.

How Long Do Paver Installations Last?

With proper installation and maintenance, paver installations can last anywhere from 20 to over 50 years, depending on the material and usage. The key is routine care and addressing any issues promptly.

Are Pavers Better Than Concrete?

Many homeowners prefer pavers over concrete due to their aesthetic appeal, durability, and ease of maintenance. Unlike poured concrete, pavers are less likely to crack and can be easily replaced without significant disruption.

How to Choose the Right Paver Style for My Home?

Consider your home’s existing architecture, the intended use of the space, and personal style when selecting paver styles. Consulting with a professional can provide valuable insights into what will work best for your home.

What’s the Best Time of Year for Paver Installation?

The ideal time for installation typically falls in the spring and fall—during mild weather conditions that ensure optimal installation and durability.

How Much Do Paver Companies Near Me Charge?

The cost of paver installation can vary widely, generally ranging from $10 to $25 per square foot, depending on material choice and complexity of the project. Obtaining multiple quotes will help in understanding local market pricing.

Top 10 Essential Tips for a Beautiful Home and Garden

Understanding Home and Garden Basics

Creating a beautiful and functional home and garden space goes beyond aesthetics; it encompasses understanding the underlying principles that guide design and maintenance. This section will delve into the importance of thoughtful home and garden design, essential terminology, and how to assess your space effectively.

The Importance of Home and Garden Design

Home and garden design plays a crucial role in enhancing the quality of life for the inhabitants. A well-designed space is not merely about visual appeal; it impacts functionality, comfort, and even mental well-being. For example, studies have shown that individuals who spend time in well-planned gardens report lower stress levels and increased feelings of happiness.

Moreover, effective design can significantly increase property value. According to the National Association of Realtors, landscaping can yield a return on investment of up to 100%. A thoughtfully designed garden can create an inviting atmosphere that attracts potential buyers, making it a vital consideration for homeowners.

Common Home and Garden Terminology

Understanding the language of home and garden can empower homeowners to make informed decisions and communicate effectively with professionals. Here are some common terms to know:

  • Hardscaping: Refers to the non-plant elements of landscaping, such as patios, pathways, and retaining walls.
  • Softscaping: Encompasses all the living elements of landscaping, including plants, trees, and soil.
  • Perennials: Plants that live for more than two years, providing garden beauty and stability over time.
  • Annuals: Plants that complete their life cycle in one growing season, often used for seasonal color.

Assessing Your Space: Size, Layout, and Functionality

Before embarking on any home or garden project, assessing your space is essential. Start by measuring the square footage of your home and garden area. Consider the layout and how different zones can be utilized effectively. For example, if you have a small backyard, think about vertical gardening or container gardening to optimize your space.

Additionally, functionality should guide your design choices. Ask yourself:

  • What activities will take place in this space?
  • How can I maximize natural light and airflow?
  • What are the existing features that can be enhanced or incorporated?

Utilizing tools like garden planners and design software can also aid in visualizing your project before execution.

Essential Gardening Techniques for Beginners

For those new to gardening, starting can be daunting. However, with some foundational knowledge, anyone can cultivate a thriving garden. This section covers crucial gardening techniques that every beginner should master.

Selecting the Right Plants for Your Climate

Choosing plants suited to your climate is fundamental for gardening success. Each plant has specific growing conditions, including temperature, sunlight, and moisture requirements. Start by identifying your USDA Plant Hardiness Zone, which indicates the types of plants that will thrive in your area.

For instance, if you live in a warmer zone (like zone 9), you might opt for heat-tolerant plants such as succulents or tropical flowers. Conversely, in cooler zones (like zone 4), hardy perennials like daylilies or hostas would be more appropriate. Local extension services or garden centers can provide valuable insights into suitable plants for your region.

Soil Preparation and Fertilization Basics

Healthy soil is the foundation of any successful garden. Begin by testing your soil to understand its pH and nutrient levels. You can purchase a soil testing kit or send a sample to a local extension service. Based on the results, you may need to amend your soil with organic matter, such as compost or well-rotted manure, to improve fertility and drainage.

Fertilization is also key. Consider using slow-release fertilizers that provide nutrients over time, or organic options like bone meal for phosphorus, which supports root development. A general rule of thumb is to fertilize your plants at the beginning of the growing season and again mid-season for optimal growth.

Watering Techniques: Timing and Methods

Watering is often overlooked but is crucial for plant health. The best time to water is early in the morning or late in the evening when temperatures are cooler, minimizing evaporation. Aim for deep watering rather than frequent shallow watering to encourage deep root growth.

Consider using various watering methods:

  • Drip irrigation: Efficiently delivers water directly to the plant roots.
  • Soaker hoses: Allow water to seep through porous materials, ideal for garden beds.
  • Hand watering: Provides control and is often necessary for container plants.

Monitor the soil moisture level to determine when to water. A simple test is to stick your finger into the soil; if it feels dry an inch down, it’s time to water.

Home Improvement Projects to Enhance Value

Improving your home not only enhances your living experience but can also significantly increase property value. This section will explore high-impact home improvement projects that provide the best returns on investment.

Identifying High-Impact Areas for Renovation

When considering home renovations, focus on areas that potential buyers value the most. According to Remodeling Magazine’s Cost vs. Value report, kitchen and bathroom remodels typically yield the highest returns. Simple updates, such as new fixtures, countertops, or cabinetry, can make a substantial difference without breaking the bank.

Additionally, curb appeal is critical. Investing in landscaping, exterior painting, or new siding can enhance first impressions and drive interest in your home. For example, a homeowner who invested $5,000 in landscaping improvements saw an increase in offers when selling their property.

Energy Efficiency Upgrades: Insulation and Windows

Energy efficiency upgrades not only lower utility bills but also appeal to eco-conscious buyers. Start with insulation, which is crucial for maintaining temperature control within the home. According to the U.S. Department of Energy, proper insulation can reduce heating and cooling costs by 20% or more.

Upgrading windows to energy-efficient models can also make a significant impact. Double or triple-pane windows minimize heat loss, while low-E coatings reflect heat back into the home. Though the initial investment may seem high, the long-term savings on energy bills and increased home value often justify the cost.

DIY vs. Hiring Professionals: Making the Right Choice

Deciding whether to tackle home improvement projects yourself or hire professionals can be challenging. Consider these factors:

  • Skill level: Assess your own abilities. If a project requires specialized skills (like electrical work), it’s often best to hire a professional.
  • Time constraints: If you have limited time, hiring professionals can ensure timely completion.
  • Cost: DIY projects can save money, but be wary of potential mistakes that can lead to costly repairs.

For smaller projects, such as painting or landscaping, DIY can be rewarding and cost-effective. However, for larger renovations, investing in professionals can save time and ensure quality workmanship.

Advanced Landscaping Strategies

For homeowners looking to take their landscaping to the next level, advanced strategies can help create a stunning and sustainable outdoor environment. This section will explore permaculture principles, hardscaping, and the integration of technology.

Creating a Sustainable Garden: Permaculture Principles

Permaculture is a holistic approach to gardening and landscaping that works with nature rather than against it. The core principles of permaculture emphasize sustainability, biodiversity, and resilience. Start by observing your garden space: note the sunlight patterns, wind directions, and water availability.

Implement strategies such as:

  • Companion planting: Pairing plants that benefit each other, like tomatoes and basil, can improve growth and repel pests.
  • Mulching: Applying organic mulch retains moisture, suppresses weeds, and enriches the soil as it decomposes.
  • Rainwater harvesting: Collecting rainwater reduces water usage and provides a sustainable source for irrigation.

By incorporating these principles, you can create an eco-friendly garden that thrives while minimizing your environmental impact.

Incorporating Hardscaping: Patios, Pathways, and Walls

Hardscaping elements enhance both the functionality and aesthetics of your outdoor space. Patios provide areas for relaxation and entertainment, while pathways can guide visitors through your garden. Retaining walls can define spaces and prevent soil erosion.

When designing hardscaping features, consider materials that complement your home and garden style. For example, natural stone or brick can create a rustic look, while concrete offers a modern aesthetic. Be mindful of drainage and accessibility to ensure these structures are both practical and beautiful.

Using Technology: Smart Irrigation and Garden Management Tools

In today’s digital age, technology can significantly enhance garden management. Smart irrigation systems can automate watering schedules based on weather conditions, conserving water and ensuring plants receive adequate moisture. For instance, systems like Rachio or RainMachine allow you to control your irrigation from your smartphone.

Additionally, garden management apps can help you track plant health, growth progress, and care routines. Apps like PlantSnap can identify plants and provide care tips, making it easier for homeowners to maintain their gardens effectively.

Seasonal Home and Garden Maintenance Tips

Maintaining a home and garden requires seasonal attention to ensure longevity and beauty throughout the year. This section offers essential maintenance tips tailored to each season.

Spring Cleaning and Preparation for the Growing Season

Spring is the perfect time to refresh your home and garden. Start by decluttering living spaces and deep cleaning. In the garden, remove debris and dead plants to prepare for new growth. Conduct a soil test and amend it as necessary to ensure optimal growing conditions.

Additionally, consider starting seeds indoors or purchasing seedlings for transplanting. Spring is also an excellent time to apply pre-emergent herbicides to control weeds before they sprout.

Winterization Strategies for Home and Garden

As colder weather approaches, preparing your home and garden for winter is crucial to prevent damage. In the garden, cut back perennials and protect vulnerable plants with mulch or burlap. Drain and store garden hoses to prevent freezing.

For your home, check insulation, seal gaps around windows and doors, and ensure your heating system is functioning efficiently. These proactive steps can save on energy costs and prevent costly repairs in the spring.

Seasonal Pest Control: Prevention and Treatment Methods

Pest control is a year-round concern for homeowners. Seasonal pest management strategies can help keep unwanted invaders at bay. In the spring, focus on prevention by maintaining healthy plant conditions and employing companion planting to deter pests.

In summer, monitor for signs of infestations and treat early. Organic solutions like neem oil or insecticidal soap can be effective without harming beneficial insects. As fall approaches, take measures to prevent pests from overwintering in your home, such as sealing entry points and removing food sources.